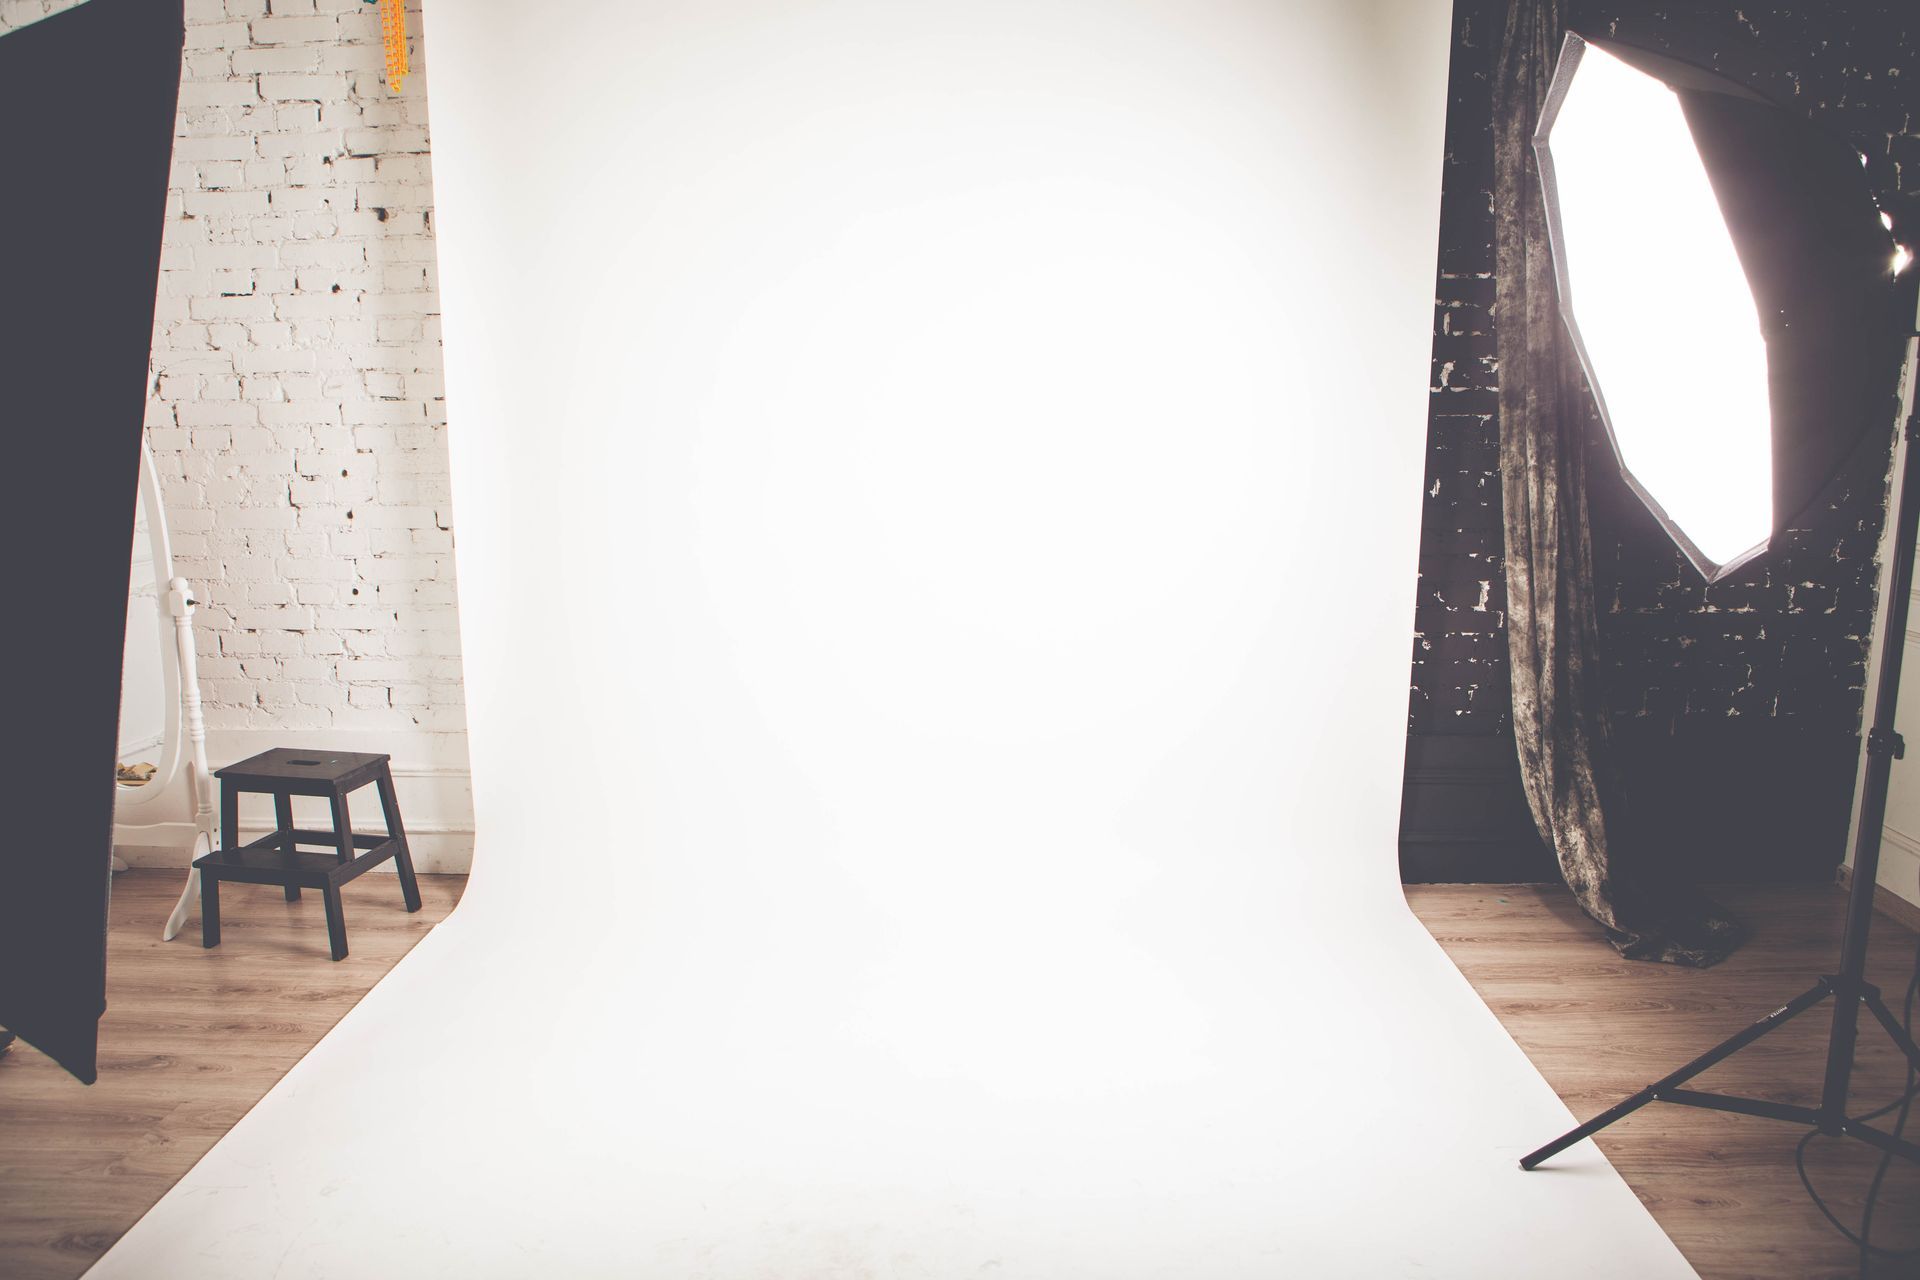
Setting up a home photography studio, however exciting and practical, whether you are a professional photographer or someone who is simply looking to enhance your craft. With a home studio, there is more flexibility; you save on costs. You are allowed to get high-quality images without having to rent a space. A well-equipped home studio can make a real difference when it comes to the artistic creation right from home, whether photographing portraits or product shoots. Whether you’re an aspiring photographer or already professional, professional product photography with Howard MacDonald Jr Photography will help you a great results. In this guide, we will cover everything you need to know to set up a fully functioning home photography studio, from recommending space, choosing equipment, lighting, composition, and obtaining expert tips. 1. Choose the Right Space A great home studio depends on choosing the perfect space. Not everybody has an extra room specifically for photography; however, you can still create your studio with the proper arrangement. Factors to Consider When Selecting a Space Room Size: Decide on a room that can comfortably hold your camera setup, lighting, and subject. Choosing a room with high ceilings is preferable for light setups. In the case of a lack of space, go for a corner setup or a foldable backdrop system. Lighting Conditions: Natural lighting is achieved through a room with big windows that do not require artificial lighting. The south-facing windows are also constant during the daylight. And if you are using artificial lighting, have proper light control with the curtains or blackout blinds. Noise Level: Find a place that’s away from street noise or household disturbance to avoid any background noise interference. Particularly when studio lights are used, you can use ventilation to prevent overheating. Soundproofing solutions, such as acoustic foam, can help if you record video. Flooring and Walls: Light walls and the general backdrop idea allow for fewer reflections. Accessibility: Provide the convenience of equipment and storage to guarantee an efficient workflow. How to Adapt Small Spaces for a Photography Studio Use collapsible backdrops or use a corner wall setup, which allows you to utilize maximum space. Install the wall-mounted lights to free floor space. Go for a compact lighting setup, and choose the foldable tripods. Ventilation and Environment Control Ensure air flows in the space to prevent overheating of equipment. In a humid area, use a dehumidifier for the proper protection of your gear. 2. Essential Equipment for a Home Photography Studio The right gear is necessary for a high-quality home studio. Here is a breakdown of essential equipment. Cameras and Lenses Best Cameras for Home Studios: Canon EOS R6, Sony A7 IV, Nikon Z6 II etc. Lenses : Portrait photography : 50mm f/1.8 or 85mm f/1.4 Product photography: 100mm macro lens for detailed close-ups Wide-angle photography: 24mm or 35mm for interior and real estate shots Lightning Setup Softboxes & Umbrellas: Diffuse harsh light for soft, professional-looking images. Ring Lights : Ideal for portrait photography and video content. LED Panels: Adjustable brightness and color temperature for product photography. Natural Light consideration: Set up your studio with light coming off of large windows and use sheer curtains to filter the light. Backdrops and Props Backdrop Materials : Muslin, paper rolls, vinyl, and collapsible backgrounds. Backdrop Types: Seamless paper (white, black, grey) Vinyl backdrops for product photography Fabric backdrops for portrait shots Props: when added in the form of tables, mirrors, or textured surfaces give depth and create large amounts of creativity to your shoots. Use props to maximize composition and minimal ones so you do not further confuse the viewer. DIY Tips: Use colored poster boards for affordable product backdrops. Tripods and Stabilization Tripods: Take out a good, adjustable tripod for stability. Gimbals and stabilizers: Essential for shooting smooth videos. Editing and Software Adobe Lightroom and Photoshop: The standards of the industry with professional image editing. Capture one: Tethered shooting and color correction required. GIMP: Free alternative for photo retouching. 3. Setting up Studio Lightning Lighting is essential to photographic results. Natural or artificial lighting has an ontological effect. Natural Light Cost-effective and produces organic-looking imagery Creates soft, flattering portraits The best use is when strategically placed within a window and properly reflected. Artificial Light Complete control over intensity, color temperature, and consistency Very useful for product photography, which requires precision It is independent of weather or time of day. Three-point Lightning Setup This fundamental setup is the basis for professional photographers to carry around. Key Light: Most of the time, your primary source of illumination is a softbox or an LED panel. Fill Light: On the contrary, they reduce any harsh shadows that an excessive amount of exposure can throw on the subject by using reflectors or other secondary lights to balance the exposure. Back Light: It separates the subject from backgrounds creating dimension to compositions. Using Reflectors and Diffusers Reflectors: White surfaces brighten shadowed areas. Gold surfaces introduce warmth to the scene. It’s also able to nicely reduce the harsh contrast of light directed to it. Diffusers: Convert hard direct light to more of a flattering, softer light. 4. Managing Background and Composition Choosing the Right Backdrop: For Product Photography: Seamless paper in white, black, or neutral colors. Sometimes keeps the viewer’s focus on featured items. Creates clean, distraction-free environments For Portraits Photography: Modes that offer fabric or collapsible options provide smooth and consistent backgrounds. Solid colors or thick elements will give the skin character and depth. For Creative projects: Have a bat or textured wall, brick pattern, or custom-painted canvas. Use fabrics, surface paints, or, indeed, digital backgrounds. Eliminating Background Distractions Use low f-stop values to blur unwanted elements and thus get a shallow depth of field. Reflected surfaces that cause bright highlights should be avoided. Keep props and color palette minimal to keep the subject in focus. Importance of Color Schemes and Contrast Professional aesthetics for implementing complementary color schemes. Using a light background creates an airy atmosphere. Contrasting colors enhance subject visibility. Moody and dramatic dark background effects can be created. 5. Soundproofing and Environmental Control Audio Management: Reduce ambient noise with the help of the installation of carpeting, curtains, and acoustic panels. Use of directional microphones for audio recording. Climate Consideration: Maintaining a constant temperature to avoid equipment overheating. Use LED lighting as opposed to tungsten to lower heat production. Control humidity level so sensitive gear does not get damaged. 6. Budget-Friendly Tips for Business Affordable Lightening Alternatives: Use desk lamps with daylight bulbs as softbox alternatives. White bedsheets and shower curtains are your DIY diffusers. Cheap Backdrops: Get source large shaped color papers from the craft stores. Utilize bedsheets for fabric-based backgrounds. DIY Tripods: Makeshift tripod alternatives include a stack of books or boxes. 7. Organizing Your Photographic Gear Incorporate shelving systems for both lenses and camera bodies. Small accessories can be stored in drawer organizers. Mounting wall shelves for easy access to some of the things used repeatedly Identify all cables at a glance. Use velcro ties to prevent tangling, inevitably, and secure. Memory cards are protected with the use of protective cases. 8. Workflow and Post Processing Digital Workflow Setup: Implement consistent naming conventions. Easy to retrieve by date, project, or client. Editing Tips: It’s great to have some presets as well as batch editing to reduce time. Keep uniformity in your projects’ editing styles. Backing up Files: Redundant storage in external drives and the cloud services. Think about RAID system solutions for professional backup. 9. Expert Tips from Professional Photographers Insights from Howard McDonald’s Jr Photography “Consistent lighting creates professional results.” “Engage in practice with several lighting sets for your style.” “Good lighting is also the critical component of producing high-quality product photography.” “Shoot always in RAW to ensure maximum flexibility later on.” Common Beginner Mistakes to Avoid Mistake: Using only overhead room lighting. → Solution: Invest in directional lighting. Mistake: Ignoring composition → Solution: Follow the rule of thirds. 10. Advanced Techniques for Home Photography Studio Experimenting with Different Lightning Setups Split Lightening: Creates dramatic shadows for portraits. Rambrandt Lightening: Makes an image look more geeky and good fitting. Clamshell Lightening: Great for beauty and fashion photography. Tethered Shooting for Real Time Reviews Connect your camera to your computer for immediate feedback. Precise exposure control adjustments to real-time. Ureal-time Screens for Creative Composites Bump up your creative cap day hunting by adding digital backgrounds. Ideal for commercial photography and video production. Final Thoughts The act of setting up a home photography studio is a fun experience, as it’s an opportunity for you to have total creative freedom in your work. If you want to shoot from home, there are some things you can do to carefully choose the right space, invest in the essential equipment, to master the lighting techniques of a professional to get professional quality shots. No matter your level of experience with photography, Howard MacDonald Jr Photography offers photography services in product photography, portrait photography, and creative studio setups. First, start small, and then improve gradually and make beautiful photography in your home studio.
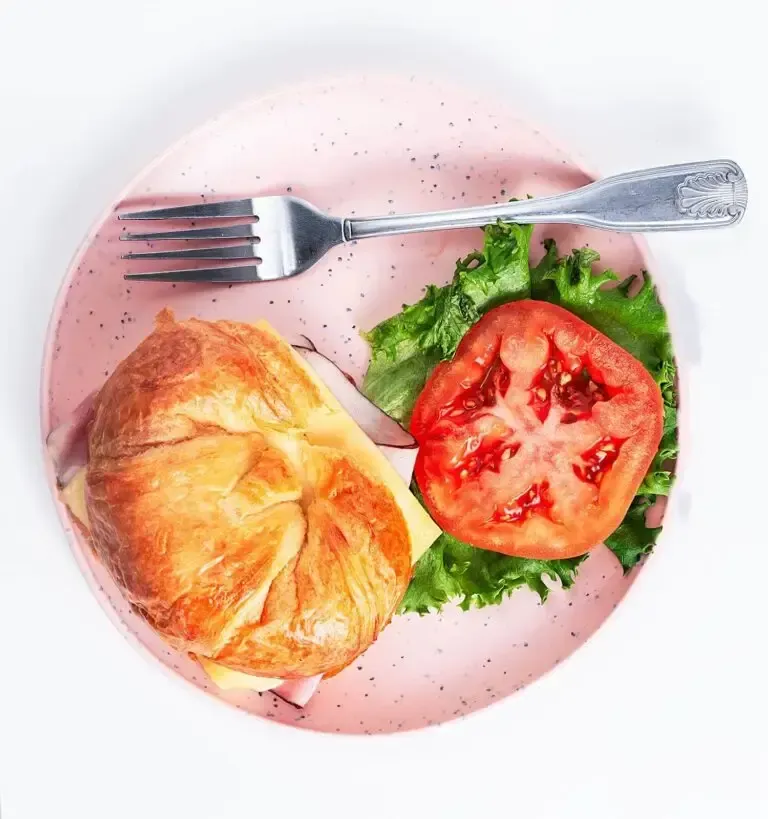
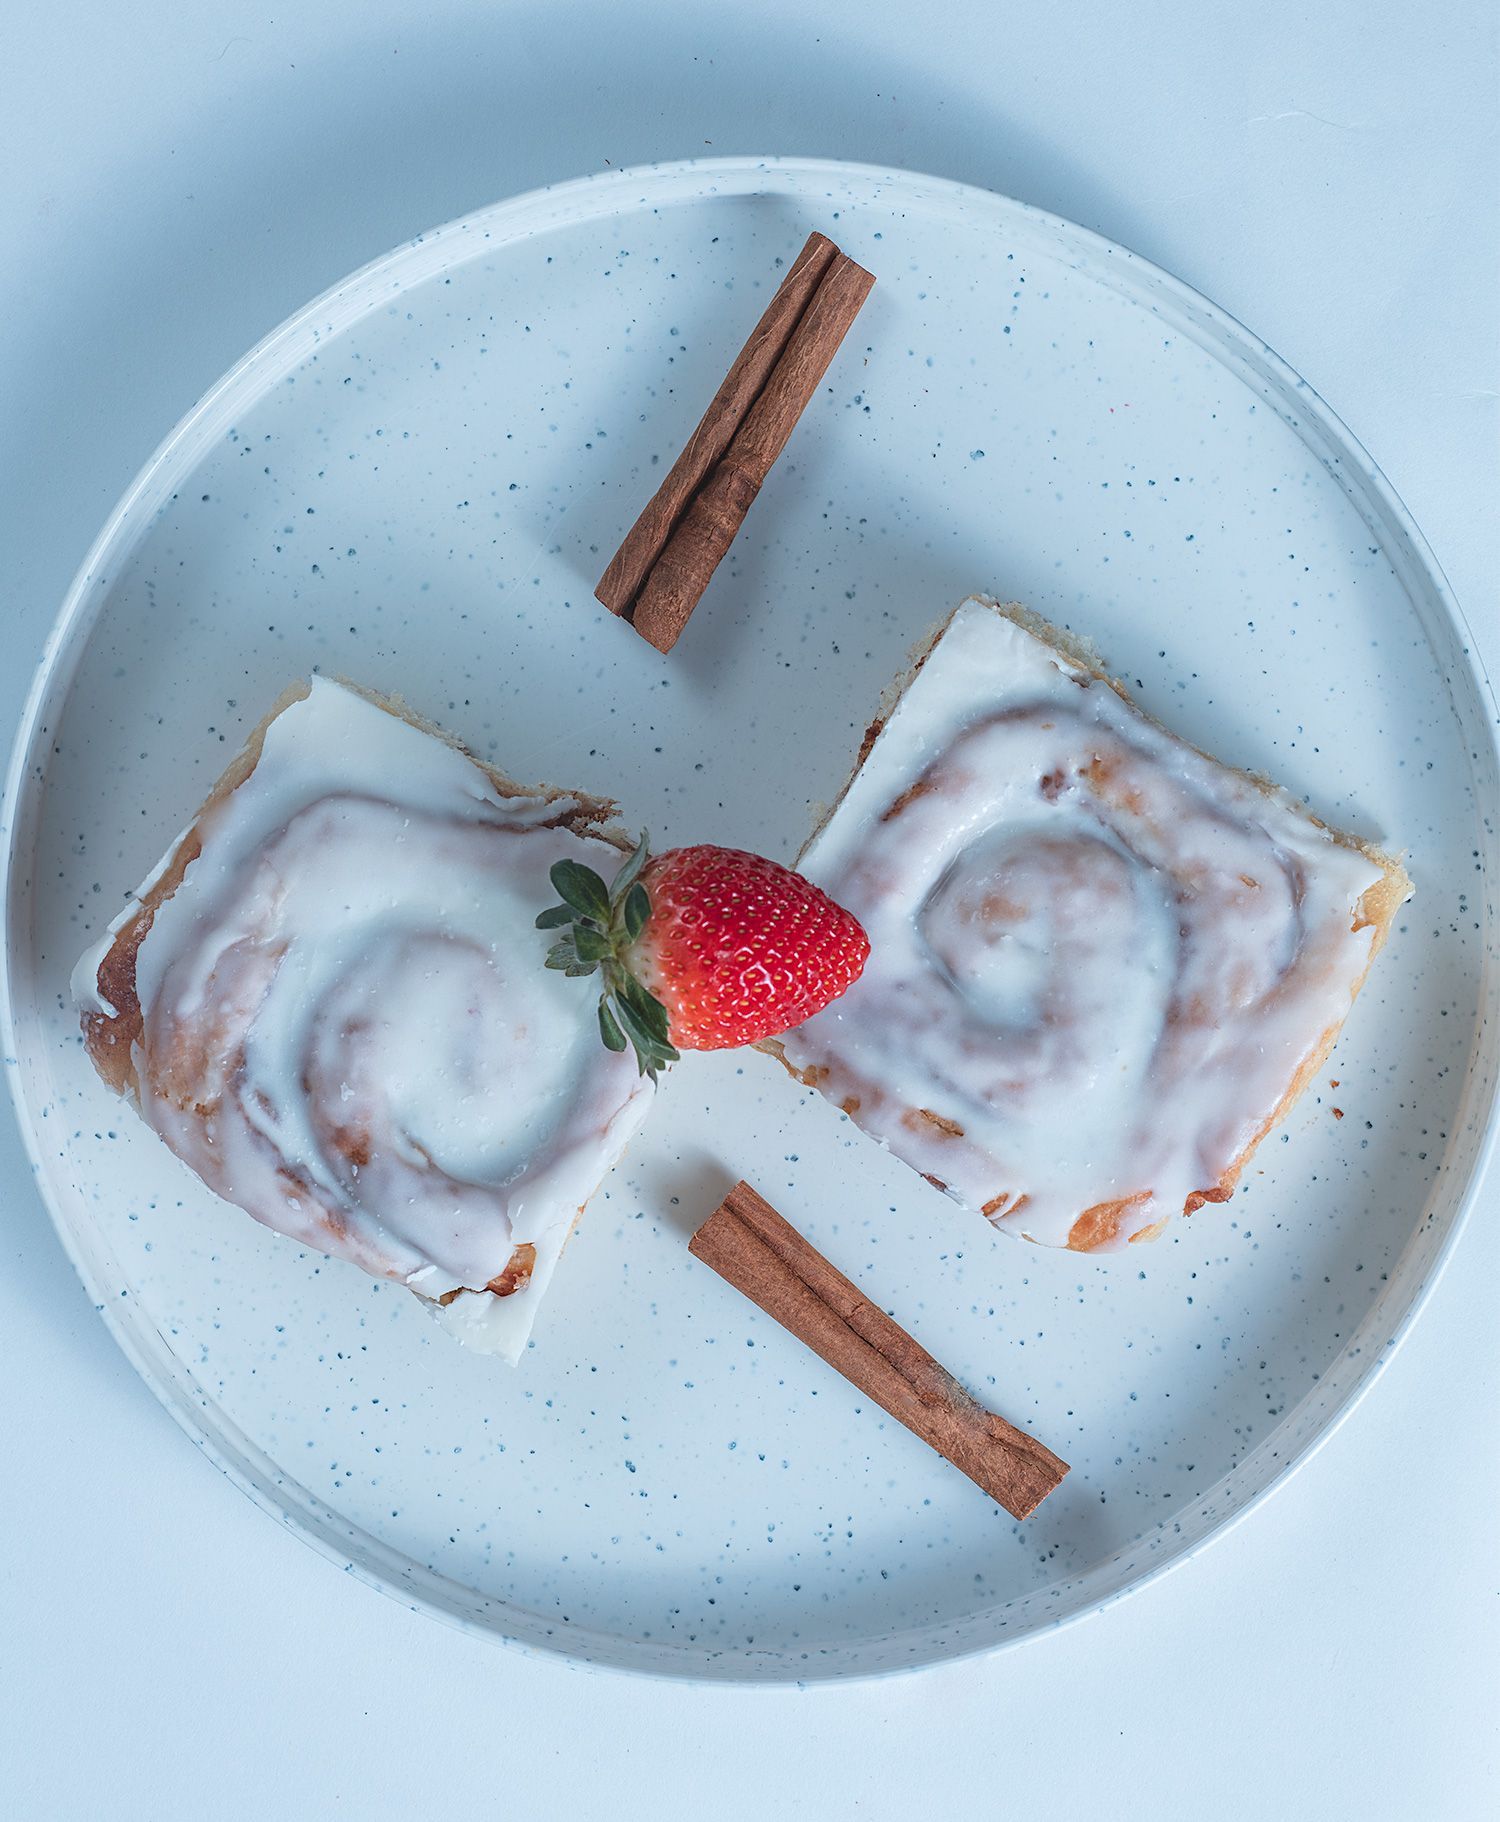
Great food photography can do a lot of things! It can stir up your viewers’ appetites, persuade diners to place an order and help you sell insane amounts of food and recipe books. Effective food photography involves visual storytelling, and a proper description of the dish’s origins, preparation method, expected flavors, and textures. A food photographer tells a story using lighting, composition, and styling that captivates the spectator and entices them to try the dish. Simply put, food photography is a fantastic chance to connect with people who share your enthusiasm for cooking, explore your creativity, and enjoy trying new methods. Food photography has something to offer everyone, whether you’re a hobbyist or a professional photographer. In this article, you will discover how to capture food photos like a pro. FOOD PHOTOGRAPHY CHALLENGES Catch It If You Can Food may dissolve rapidly, melt, cool, fade, and other ways. Your first attempt at photographing ice cream will give you a good idea of why food poses such a photographic difficulty. Or even “not so solid.” You have roughly five minutes before a pool of melted cream covers your background or surface. Indeed, the cheese on a pizza is melted only for a short while outside of the oven. Do you want to capture the lovely steam rising from your steaming tea? You underestimate how much labor that will take. Can Be So Boring Food can be flat, dull, and uninspiring, with nothing exciting to talk about. What is the food model I find most frustrating? A dilemma. Sounds good, but the neutral colors of tortillas and cheese sure make it more difficult. You’ll know what I mean if you’ve ever done it. Composition Composition is a crucial skill necessary for all forms of photography to produce outstanding shots. Particularly when it comes to food photography. Understanding the subtleties of food can be difficult. The shapes that can be found in food photography are endless. The food comes first, followed by the plates, linens, surfaces, extras, and props. In and of itself, setting up a shot so that it flows is an artistic endeavor. Capturing mouthwatering food photos requires skill. The food stylist must carefully construct each scene to enhance the main dish without creating clutter. Thoughtful styling adds depth and interest to pictures without it being distracting. Proper composition leads the viewer’s eye to focus right where you want it. The arrangement of elements in the frameworks together tells a visual story and conveys the tone you wish to achieve. With good composition, you can highlight the appetizing qualities that make someone want to grab a bite through the photo! Careful consideration of lighting, angles, props, and other photographic elements will result in an image that captures the essence of the food and draws people in. 4 WAYS TO IMPROVE YOUR FOOD PHOTOGRAPHY Find Your Angles You’ll see a trend if you examine enough expert food photos. The two joint angles frequently used are the flat-lay shot from above and the low-over-the-table shot from the side. You should start your composition from these viewpoints. Rather than randomly choosing one, take the time to carefully consider what angle will work best for your shot. Why? Because the kind of tale you tell will depend on where you position the camera. As you arrange your composition, keep the food in mind. Please take note of its dimensions, form, height, and distinctive features. Then, position the camera to emphasize these attributes best. Focus on the Hero Object and Surround It A hero object or the main subject of your photo shoot that you wish to draw attention to. Setting this up correctly is the first step in creating a basic setup for food photography. It is typically the main course. Hence, you must decide on your hero item now. Set it down on the table. After that, envelop it with food-related objects. Cooking equipment, oils, sauces, and ingredients can all reveal how a dish was prepared. Herbs, glasses, tins, linens, and fabrics can all give away where a dish comes from or what season it is served. Place a few objects in the background and front, but don’t go crazy. These will enhance the shot’s narrative and add genuine dimension to your composition. Natural Light Is Your Friend One of the keys to food photography is light. Ineffective lighting design will detract from your images and alienate viewers. However, you can quickly elevate your food photographs to a new level if you can figure out how to regulate the light. Putting a diffuser between the food and the window is the first thing to do, especially when working in direct sunlight. You see, dazzling highlights and solid and dark shadows are created by direct sunshine. These can be overpowering, but you can soften the light, lessen the highlights and shadows, and create a beautiful effect by adding a diffuser. Just in case you are wondering, diffusers are inexpensive and easily purchased from any photographic supply store, but you may also create your own by simply hanging a thin white bedsheet in front of the window. Add a touch of oil or spray the food with water Professional food photography creators often add a touch of oil or spray the food with water. This trick will make your images pop, making your food look more attractive to the customer. It takes some experimenting, but once you have assembled the perfect dish and applied oil or water, you can create some exceptional pictures. Make use of your knowledge!!!! Now that you’ve finished this article, you know how to photograph food like a pro – so you’re ready to start capturing some stunning food photos that will make people lick their lips. Just remember to always pay careful attention to the light and the composition. That way, your cooking photos can shine!

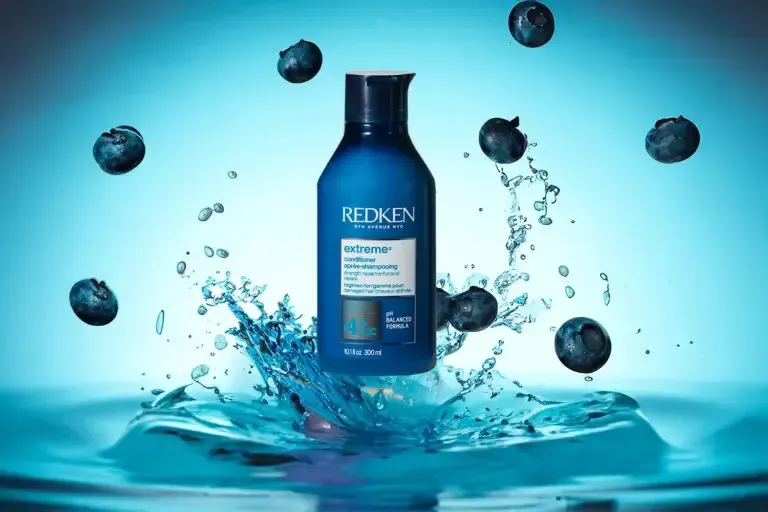
Learn how to capture the beauty and elegance of your favorite wines Taking pictures of wine is cool for people who love fancy stuff. You have to be good at using a camera to appreciate the art, skill, and love that goes into making each bottle of wine. Mind-blowing wine pics are a total win for getting people interested in buying your products. Ready to learn the cool tricks of awesome wine photography that’ll make people want your wines – so bad? Stick around till the end. Capturing the Essence Through the Lens To get it right with wine photography, it is crucial to treat the process as a form of art. It’s more than merely taking a pretty picture. It’s about capturing the true essence of the wine – its smell, taste, and the special qualities that make it amazing. By using light, color, and texture, a talented photographer can transport you straight to the heart of the wine. The goal here is to capture every little detail and complexity. The Role of Light in Wine Photography Light is super important in wine photography because it’s the element that brings your pictures to life. Knowing how to use natural light and artificial light in the right way is crucial for making cool photos. Whether it’s making a wine glass look shiny or showing off the beautiful colors of red wine, being good at using light is a big deal. Showcasing the Nuances of Color Your ability to capture the wine’s color and showcase its unique hue is crucial in wine photography. From rich purple Malbecs to golden Chardonnays, the color should reveal details about the wine’s origin and production methods. Mastering color means precisely adjusting the white balance to capture accurate shades. Professional photographers utilize color grading techniques to enhance and refine the tones, making those reds pop and yellows glow. Pay close attention to highlighting the nuances – this attention to color will make your wine photographs truly shine. Revealing Intricate Textures Beyond color, texture plays a starring role in unveiling wine’s true character through photography. Think about those glistening water droplets adorning a chilled bottle – catching their intricate patterns adds serious drama to a fancy glass. To bring out texture, do not relent on exploiting your macro lens. Get up close and personal. Experiment with lighting angles to make every bead, groove, and streak leap off the screen. Side lighting can be your best friend here, casting shadows that define and accentuate dimensional surfaces. With some textural artistry, you’ll have viewers yearning to reach out and caress the image itself. these textures make the picture more interesting and give it more depth. Appreciating The Aroma, Flavor, And Mouth feel Truly amazing wine photography needs more than just being good at the technical stuff, it needs a real understanding and love for the subject itself. Each wine has its special smell and taste that makes it unique. Photographers have to be creative about visually capturing these unique sensory experiences You can incorporate elements that hint at the wine’s bouquet, like fresh fruit or spices. In the end, wine photography is a really exciting hobby that celebrates the amazing world of winemaking. It involves taking beautiful pictures that show off the craftsmanship and traditions behind making wine. You have to work hard and practice frequently to improve your skills. It’s a creative and fun-filled art form. If you stick with it, the rewards are just as amazing as the best wines out there – you get to capture the beauty of nature, one perfect picture at a time.
Gone are the days of flyers plastered from lampposts to arena walls. These days, foodies are discovering their next culinary obsession with ease online. Whether you’re running a restaurant, catering service, or a food blog, your website is your opportunity to make a mouthwatering first impression. And the star of the show? Stunning food photography that practically begs to be devoured. One cannot underestimate the power of quality photography in the food business. Research has shown the significant influence of visually appealing images on the success of a website. Kissmetrics, an online marketing platform, highlighted a 12% increase in traffic and approximately 9% more sales after businesses added stunning food photography. No wonder they say a delicious-looking image is worth a thousand clicks (and maybe a rumbling tummy too)! The Power Of Appetite Appeal When people browse for food online, they’re not just looking for information – they crave to be enticed. Did you know that the mere sight of a sumptuous dish can trigger a physiological reaction? No worries, it’s a good thing. Delicate cuisines are known to stimulate saliva production and activate the same areas of the brain that are engaged when we actually eat. In other words, great food photography has the power to make people genuinely hungry. And just like clockwork, hungry people are much more likely to make a purchase. Isn’t the human body remarkable? Talking about how it responds to tantalizing visual food cues? Don’t get left behind. Leverage this instinctual reaction for your business and drive sales like crazy! Food Photography Conveys Quality And Credibility The benefits of great food photography extend beyond merely whetting appetites. High-quality images also play a crucial role in establishing a website’s credibility and professionalism. With the online marketplace becoming increasingly crowded, consumers are constantly bombarded with numerous culinary options. On this note, showcasing beautifully captured, sizzling food will instantly convey a sense of excellence, attention to detail, and expertise. More so, you have the unique chance to influence the perception of freshness, flavor, and the overall dining experience. Taking full control of this practice helps your business stand out from the competition and builds trust with potential customers. After all, if you can’t get your food photography game on point, how can customers be confident in the quality of the actual dishes? Because customers are more likely to trust a business that invests in high-quality food imagery, those extra visual touches can make all the difference in turning casual browsers into a loyal client base. Driving Engagement And Conversions Among its numerous benefits, strategic food photography can also serve as a valuable tool for better engagement and conversions on your website. Having more visually captivating images increases your chances of getting shares via social media and other networks. Your blogs will have higher visitor retention compared to others with similar text-laden content. Great food photography isn’t just about looking pretty – companies are leveraging its prospect to drive real business results. By integrating high-quality images into your website’s design, you can effectively direct users’ attention towards important calls to action. You can try to be creative with buttons like “Order Now” or reservation forms. This subtle change can result in much better conversion rates, as customers are more inclined to follow through on their purchasing intentions. It’s a win-win! Happy customers, thriving business – what’s not to love? Undoubtedly, the significance of food photography cannot be emphasized enough. By harnessing the psychological and emotional impact of this art, businesses in the culinary industry can establish a more captivating, reliable, and conversion-oriented online presence, ultimately leading to increased sales and profitability. Ready to leverage the magic of food photography in your business? Check out what our satisfied clients have to say!
Many tools at our disposal allow us to capture amazing photographs in this era of swift technical advancements. But we’re going to look a little deeper into this. In the past few years, there has been a significant narrowing of the gaps when comparing photos taken from your mobile device with professionally taken photos. The concept that your mobile phone can do all things is attractive to many, but it is actually more complicated than one might think. The fact that your phone is capable of capturing beautifully photographed images doesn’t mean it’s appropriate for business. Smart phones, most notably the iPhone, have become a marvel of quality photo in recent years and can capture very attractive pictures. However, producing visually appealing commercial pictures requires more than just high-tech equipment. 1. The Eye Of A Professional Is Trained: It takes years for professional photography worth to perfect their craft. They have an inherent knowledge of the exact location to take perfect shots that best fits several websites, online platforms, and suit your internet presence. Alongside, they have a better understanding of what is most suitable for traditional marketing materials such as newspaper and out-of-home advertising. Long-term, reliance on photos of smart phones for such essential commercial purposes can result in serious errors. Professional photographers operate quickly and successfully taking the moment to make optimum use of your business’s best angles. 2. Timed Correctly: We are all familiar with the time and cost involved in organising a photo shoot. Scheduling staff and setting up an actual location can get quite demanding. On this note, working with a professional photographers will help you minimize the need for significant editing post-production, and as a consequence maximize time efficiency in the long run. 3. Tools: Lights, Lenses And Technical Support: Although your mobile phones have great qualities, they are still unable to compete with professional photographic equipment. Some of the vital equipment required to capture the essence of your products or services include lens filters, specially designed reflectors, flash units, lighting sets, tripods, studio backdrops and more. Acquiring the knowledge to effectively use these tools may require substantial time and money. Even if you own these tools, lacking the technical know-how will lead to failure to provide amazing results. 4. Images Of A Higher Quality: Possessing professional gear alone is insufficient; you also need to understand how to use them. You must go for high-quality pictures that blend in perfectly with any channel, regardless of whether they are printed or virtual. Displaying a photograph on your webpage or elsewhere on your mobile apps with a less-than-professional appearance might result from some of the photographs’ poor translation. 5. The Vision: Professional photographers are making a living from the materialization of your vision. In order to make your best photo shoot come true, they have an innate recognition of perfect angles, optimal spots as well as the right moment. 6. Photo Editing: While several websites and apps can help you edit files, they generally do not produce sufficient results regarding effectiveness or image quality. A steep level of education is required to optimally use professional-grade software. 7. Keep Your True Objectives In Mind: You don’t have to worry about headaches when you hire a professional photographer, as they professionally produce results that are better aligned with your perception. The ability to understand your business’s specific needs can be difficult for nontechnical people, which could have a detrimental effect on results. You will be able to guarantee your expectations by being part of the shoot. As late Albert Einstein wisely said, “One picture is worth a thousand words.” Do you really want to damage your company’s reputation? Check out what our satisfied clients have to say!